Doodle
The aim of this unit is to create an Interactive Doodle that could be used on a website to entertain the user. A great example of an interactive doodle is Google Doodle which changes the Google logo for whenever there is a festive day. The doodles can be small interactive games or animations that move along using navigation script.
Research
Google Doodle
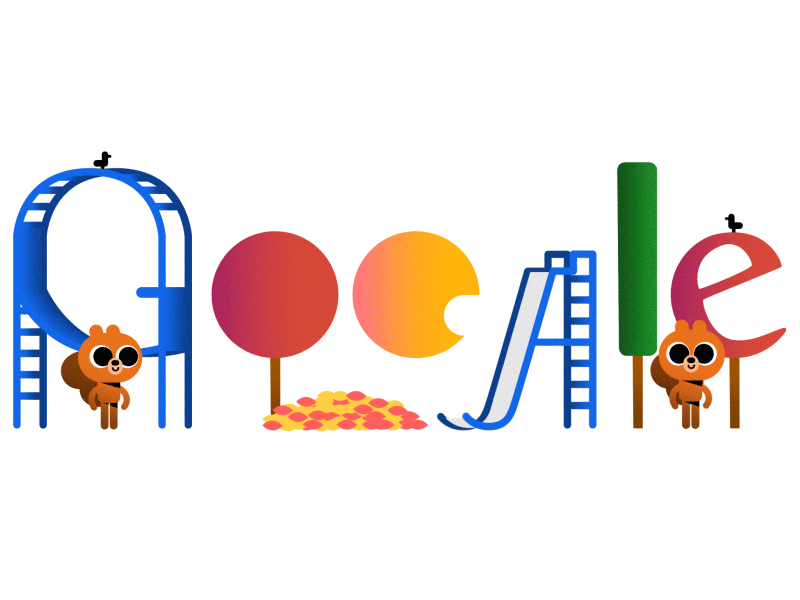
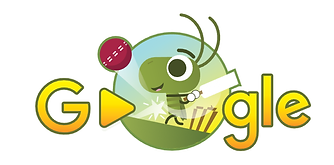
Google Doodles are a series of variating Google logos, each dedicated to a different day or celebration. Some examples of special days are; Halloween/Olympics/Mother's Day. These images contain small animations or interactive games. On the bottom and to the right you can see four different animations, I was unable to add interactive logos onto Wix since they wouldn't work properly and only worked as simple gifs. The first ever Google Doodle was created in honour of the Burning Man Festival of 1998 and was created to make users aware why the creators were absent in case servers crashed. The first ever animated doodle was created in 2010 and was a short music video of "Imagine" to mark John Lennon's 70th Birthday.
I really enjoy all of the small animations I showcase around this text, my favourite one being the bottom left one. I really like it's lack of outlines which I plan to include in my own art work for the unit as well as it's unpredictability.At first you see the animation of a single letter before seeing the rest come along, still for a brief second creating the logo. It has a lovely sequence where it can play on repeat and you will continue to spot new things each time around and at times don't even realize when the animation starts over again, although it is probable it happens when all letters get off screen.
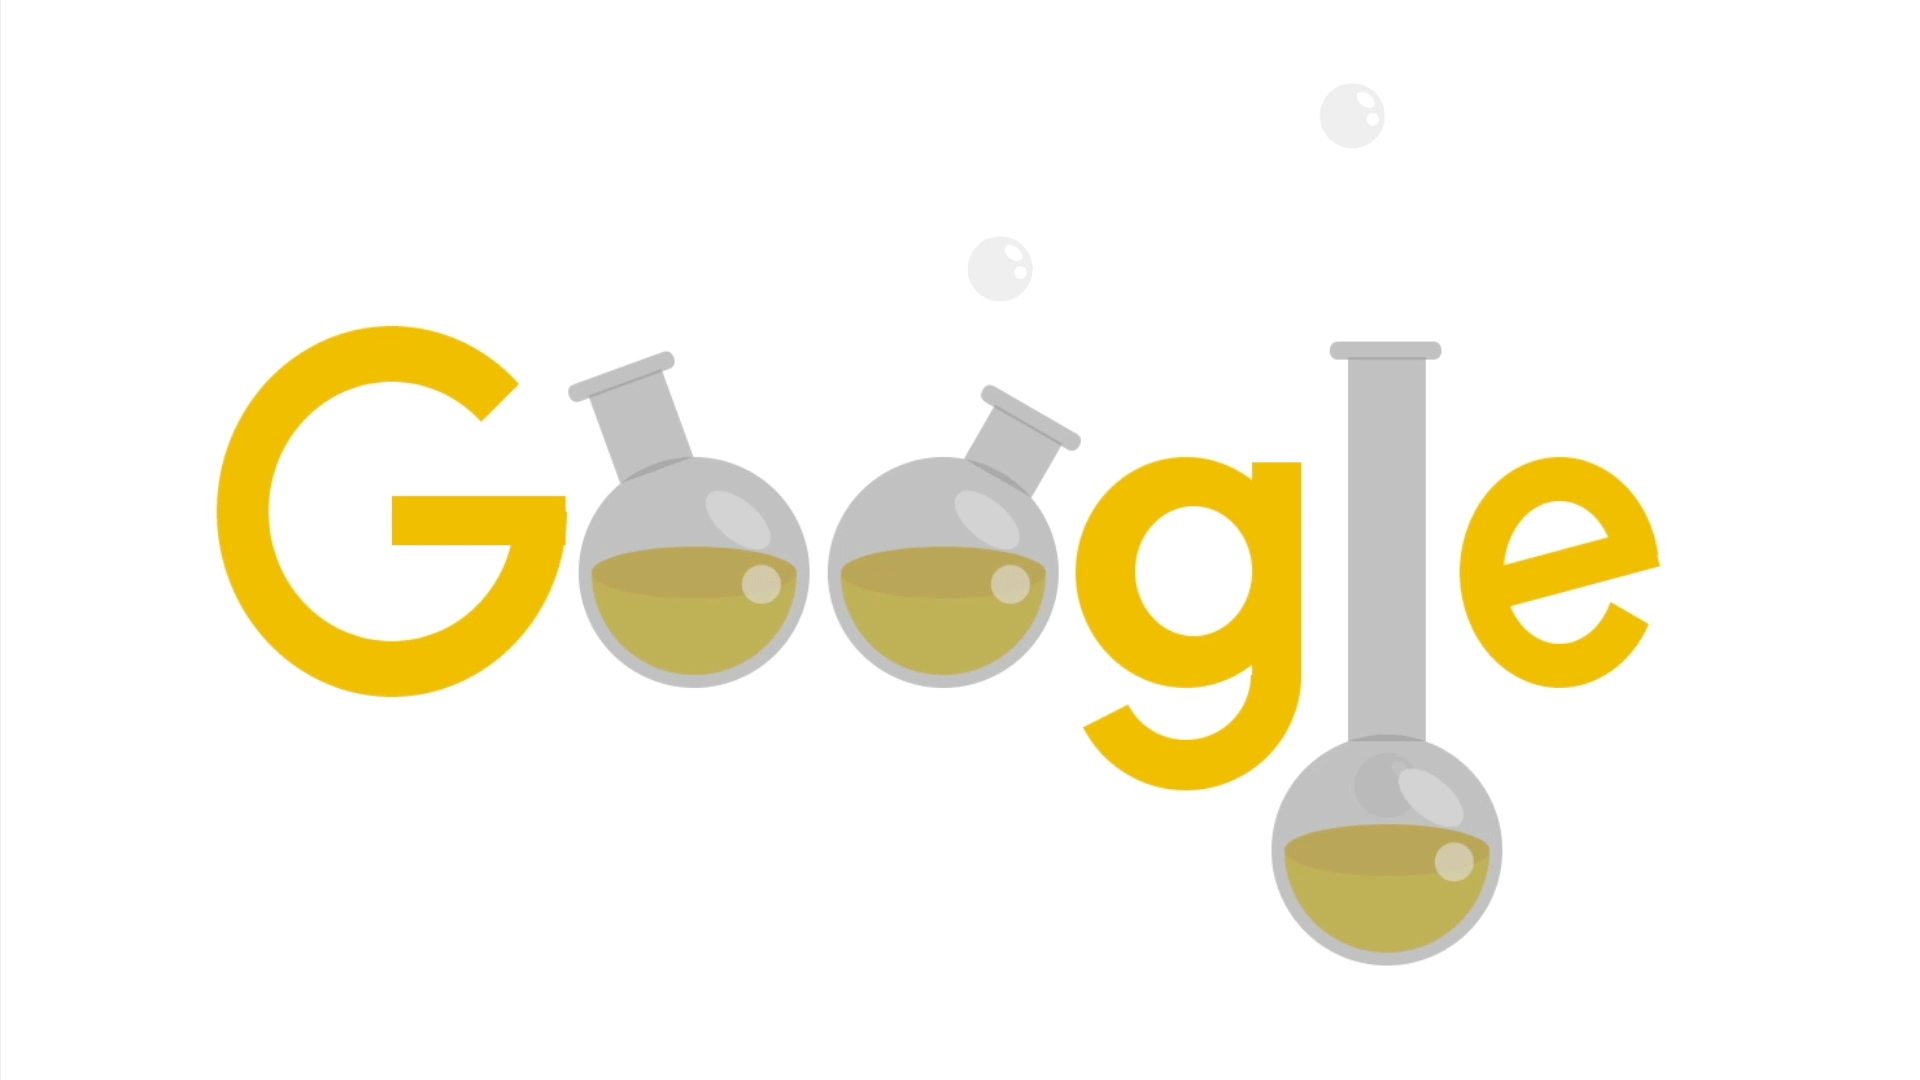
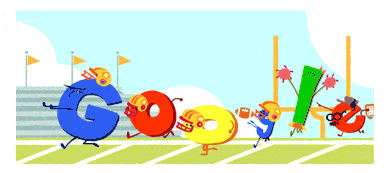
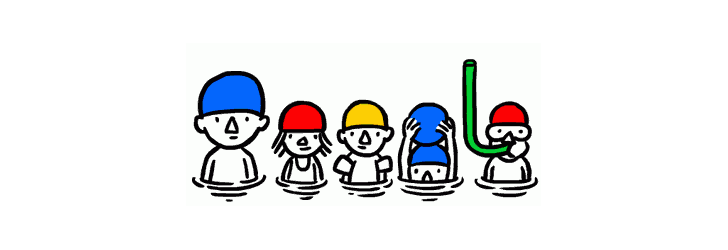
I find the swimming and science logos rather simple animations, however I do admire the swimming google logo for it's creative spin of spelling out "Google". A similar technique is used by the squirrel logo, where unusual surroundings simply spell out the logos name. I will try to use a similar technique and also spell out the google logo however in a much more clustered surrounding so that it'll be harder to spot but the viewer will feel much bigger accomplishment from it in the end.
On the left are screenshots of two interactive animations that google made and you can play with as a user. I was unable to get them to play on the website (Wix) so instead I decided to give links for the basketball 2012 celebration doodle as well as the 2017 Google Doodle created for the ICC
championship.(https://www.google.com/doodles/icc-champions-trophy-2017-begins)
(https://www.google.com/doodles/basketball-2012).
Both doodles include a mini game that revolves around their day and what it represents. The cricket takes a fun spin on the topic, making the game revolve around a pun where the pain character is a cricket and he is playing the well known sport that goes by the same name. The rules are simple, when the ball comes close to the cricket you have to click your mouse so it bounces off and each time you get a bigger score, if you miss one you loose. The basketball game has a very similar concept.
Since my final idea didn't revolve around a sport but rather Halloween I actually took a strange approach to it and made it into a puzzle. At first the concept appeared when I was still making it all about children's day, since I wanted to make it personal and puzzles were always my favourite things to get as gifts on occasions such as that but when I changed my idea I thought it still fit the theme since Halloween is inclusive mostly to young children and is a game of pretend, so I just made the puzzle Halloween themed.

Subject Concepts
Halloween
Octopus Day
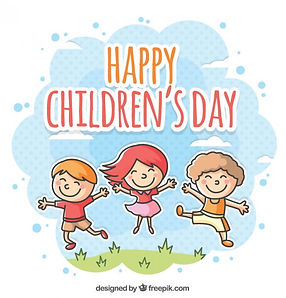
Children's Day
My first idea was to create an interactive doodle centring around the idea of Halloween. The day is celebrated each year on 31st October by families. It is believed to have Pagan roots and to be the day when the dead come back to live, very much like All Soul's Day (2nd November).
For my image, I could create it around kids that celebrate Halloween and dress up in costumes associated with the occasion. The idea for the mini game was to have it be festive. I would be outside and around the place would be hidden candy; similarly to an easter egg hunt, you'd have to find the candy that's hidden around the clustered image. When you finally found all the candy you'd get a small congratulations signs come up and couple fun facts about Halloween. Similarly to Google Doodle's the mini game will be extremely simple to complete, with at most 10 candy to find on the picture. During the game, very simple animations will be taking place such as kids knocking on doors, blinking and potentially bats flying up across the shy. I could also add a couple branches move from the wind.
The idea would be child friendly and the scene would be based off the usual Halloween setting, a street with a neighborhood/ decorated houses and front gardens as well as children around the image looking for a place to find andy. Nothing except the candy however, will be interactive. Art style will be similar to that used by Google Doodle, with no outlines and very simple.
8th of October is the national octopus day. It was the second concept that I had for my doodle which seemed quite silly but if was good if I was aiming at more general audience. I considered many animals, but it seemed too common of an idea to do the national hamster or cat day so I went aquatic. Most animals in the waters have rather simplified forms that could potentially swim around the scene along with the main octopus which would stay in one place.
The idea for a mini game was that the octopus would help a fisherman atop the shore and catch fish and throw them into his bucket. The user would click on the fish that swim by and using a rather simple animation the octopus would catch them. Then the user would click on the bucket and using a similar animation the octopus would throw the fish into the bucket. When all fish would be gone, the user would get a congratulations sign and be greeted with a couple fun facts about octopuses.
The octopus would have a simple, cartoony, orange design to look kid friendly. The fish would also have the standard cartoon style to them and be very simplified. The screen would be split into two scenes. One atop would show the shore, and the fisherman and bucket standing there. Both having small separate animations such as blinking/clapping when the user would throw in the fish. Then on the lower screen underwater would be the octopus and floating fish.
My final idea was to create my unit around the national children's day. It is celebrated on different day all across the globe but I decided to stick with the UK date, 1st June. The day itself is not commonly talked about in UK however I took the idea from Google Doodles to apply small days which aren't too well known of to my project (for example famous birthdays or says dedicated to a specific job/status).
I was planning to create an image of children playing in a room. It would be a sweet and simple image that would have flashing pink/blue lights and blinking animation. I plan for the image to have 3-4 toddlers/children all either playing by themselves or together.
I had two ideas for this image. One was for the wall of the room to hold a white board which would project different slides that the user could click through. The slides would hold different information and facts.
The second idea was for the image to have an interactive puzzle game. The image would start off on the side of the frame as puzzle pieces and the player would have to put them together. There would be around 20 pieces so that the picture would be friendly for everyone and anyone could put it together.
Once the player put all the pieces together the puzzle outline will disappear and the clear image will be revealed along with small animations to accompany it. The animations would include flashing lights/blinking and children playing around in the room. Image will be lineless and have simple art style.


Final Idea
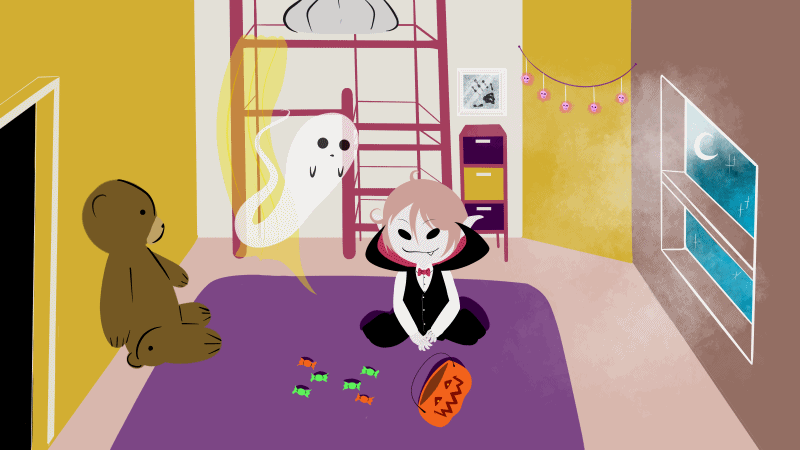
For the main doodle I have decided to incorporate two of my ideas together. I have decided to create a children's bedroom where three to four kids would hang out after Halloween. The room will be very clustered, similarly to how children's rooms often are, and be decorated in a Halloween theme; small skeletons hanging down, Halloween candy will be scattered all over the place, ect. however unlike my initial halloween idea, I have decided to keep the puzzle game from "children's day" and not the candy gathering game from "Halloween". I thought the interactive puzzle will be much more interesting than gathering candy for Halloween, and possibly still keep in theme with the day.
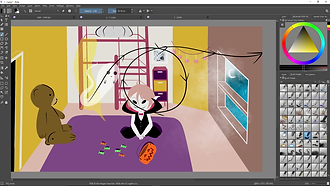
To create the puzzle I will firstly create a background image of the room, I will use lineless art similarly to Google Doodle do the art seems more 'soft' and entertaining. To do this I will firstly sketch out the idea on paper then draw it out in a program called Krita. I will then, on paper, design the children in Halloween costumes, hopefully in comedic poses and on a completely separate layer include them into the background of the bedroom. I will have to make sure that at least one will be interacting with the background so they don't seem too copy and pasted in there. I will use the same art style for the children as I did for the background which will hopefully help me save time (Since I won't have to include lines to my work or shading) and make the kids look like they belong with the rest of the scenery.
Finally I will save the finished image on a separate file and work from there on two different things; the first one being separate layers of the animation which I hope to put together in flash/ the second using easer tool to separate the final original image and create puzzle pieces out of it.
The rest of the coding and animation will be finished off in flash or another program that we use for animation in college (possibly Adobe Animate CC 2017).
Interactive Mouse Trail
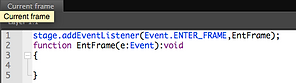
Following an online tutorial I have found on YouTube I have created an interactive mouse trail. The video that I used to create my trail can be seen on the right. At first I created a simple green circle with same coloured outlines. I then turned it into a symbol and gave it the name "Ball" just like in the tutorial so I would be sure the coding would work that was given in the video. I copied the coding exactly in open script and pressed play. The effect can be seen on a recording I made below as well as the code.
Since Adobe Animate CC doesn't allow me to make the trail interactive on Wix like Flash did I have used IMovie to take a short video of the final effect. In the end I am quite pleased with the result and want to incorporate it further into my final project; I think the users of any website would get a joy out of something similar that uses a similar idea.

Non Linear Animation
Nonlinear animation is a series of scenes of a character or background object that although have their own separate key frames and timelines, can load dynamically to form a watchable event. Examples of programs that can do this are: Adobe Flash, Adobe Director or Electricrain Swift 3D.
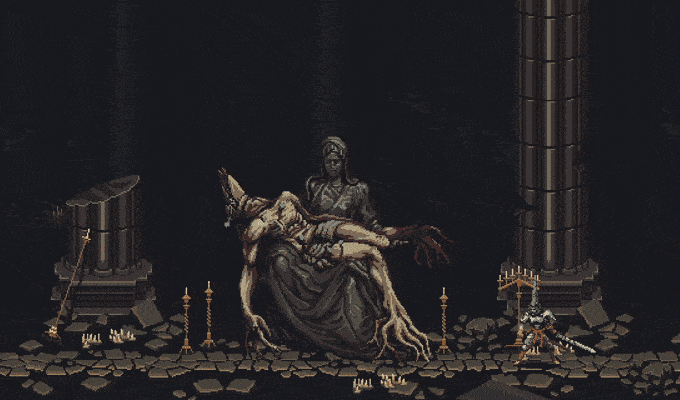
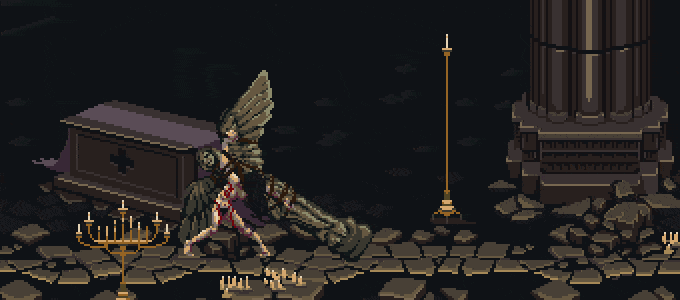
A fantastic example of an upcoming game which uses this style of animation is Blasphemous: Dark and Brutal, which is currently still being made, however since it is on kickstarter I was able to find a couple animation examples and procedures that the creators was willing to show their fans!
Progress

This is a sketched out and scanned image of what I imagined a children's room would look like. It contains a lot of things that clutter it up however I hope that because of the lineless art style it will look rather neat.
This is a screenshot of the simple linesless room I have created right after scanning. I used Krita and it's layers to be able to draw over the original scan. I put it over the room layer and changed it's opacity to 20%.
For my doodle google I will be using two separate programs. One will be Krita, used for drawing the image and characters, as well as the separate frames for any animations. The second will be Animate CC which I will use to code my animations and interactive surfaces. The final project will also be uploaded in animate cc as it allows to make frame by frame key animations and for detailed editing of the simulation.


Here I have started creating the shelves on which most of the toys will be positioned, similarly to the sketch I included a curtain over the left side, drawing it bright yellow originally and then changing it's opacity to 30%.

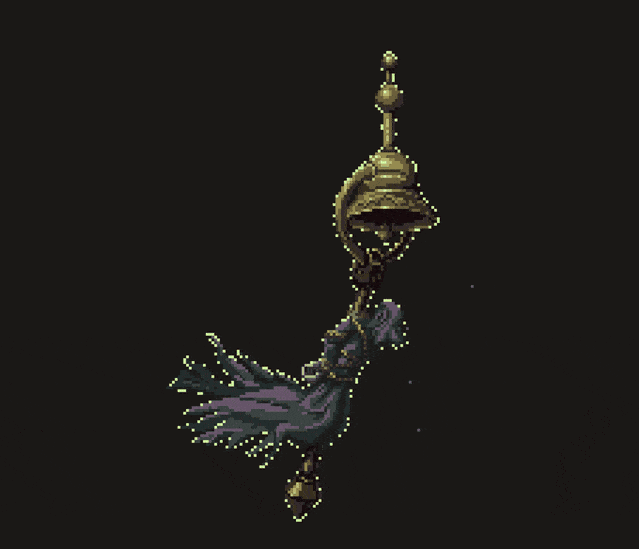
Since the original sketch was for the children's day room idea I had, I had to make some minor changes to the toys and decorations. For example instead of diamond lamps hanging I have skulls and instead of a huge plushie I added a ghost.

I changed the expression of the ghost to make it look directly at the child. I also added a hand in the mirror to make it more spooky themed. I am planning to have the skulls light up and possibly for the child to either move his head or change expressions in the final animation.

This is the final version of the puzzle image I have created. I took inspiration from both the idea I had for children's day and mixed it with Halloween. This or a version of this image without the ghost and that is affected by the "burn" filter that is used on Krita.

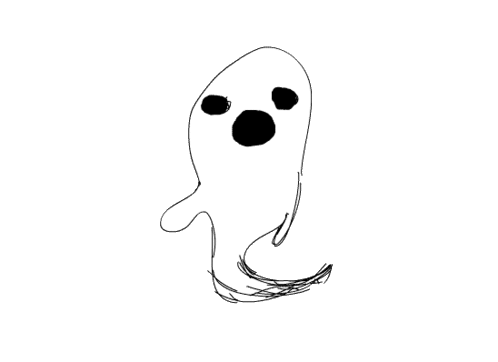
Considering I have really enjoyed the idea of an interactive mouse trail and wanted to incorporate it into my final product I have changed my idea slightly mid way through the creation of the image. using Krita and PhotoScape which I have downloaded at home I took the ghost image and gave it 100% opacity. I have then proceeded to add extra 4 frames, each time drawing over the outline, however not perfectly as to copy the effect of the image on the right. I really liked the messy feeling it got, similar to that of rotoscoping which I learned in unit 5.
It was a simple process which I think paid off as seen on the left is my final product. I plan that the cursor for the puzzle is the animation on the ghost, who is helping you pick up the puzzle pieces and put them in place. In the end when you put everything together, the ghost will do a small animation of going back to his place behind the see through curtain as seen on images above.


I started making a simple flickering light animation to see how everything would look after the puzzle was constructed. I put a black layer over my drawing and set it's opacity down to create a visual darkness in the room before adding the light by creating the same effect with with white colour. I thought that was too simple and also added pink flickering lights in the back.
Everything seemed to be working perfectly fine in the first gif considering I made it in gif maker and would later import all separate images through to Adobe CC to make it proper. The only problem I seemed to have was the lighting which made the image uninteresting and dull, almost making people want to look away because the light was irritating instead of interesting.
To solve that problem I went onto all separate files that I save the frames on and used the burn tool in Krita as shown on image above. I think it not only improved image quality but also made the style pop out more and be seen as more interesting as show cased on the left. It is still an image in practice and needs a lot of work. I am planning on adding a ghost movement before the flickering light animation where the drives off the players mouse and onto the image, his trail creating the google logo that later fades in, I think this can be accomplished with simple layer editing and drawing frame by frame the ghost move along the screen along with using some key frames.
This is the image I will use to create my puzzle, as you can see it is a version without the ghost in the background since the ghost is planned to be following the cursor and create a mouse trail, if that doesn't work as planned he'll be a small cheering addition in the right hand corner.

Using another layer to pain over I drew white outlines that would show where the puzzle would be cut into pieces. I selected the white outline and merged the two layers together before using eraser bucket tool to get rid of the lines and make them see through instead so when I exported the file it'd make cutting out easier.
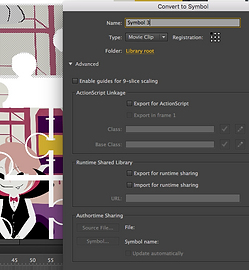
Each separate puzzle piece had to convert into a symbol as seen above.


Here you see all the puzzle pieces separated after I selected the whole image, right clicked it and selected the break apart option. This allowed me to use the lasso tool to separate piece by piece by gaps. I made each into it's own symbol using simple "symbol 1" to "symbol 20" names so they would be easily found later by codes.
As you can see on the image above after separating each puzzle piece I started coding it all together, I followed a video instructions on YouTube, a video that I will include below. I opened the action script and copied the code. Then used code snippets for Adobe to include the rest of the code instructions.

This is an image taken of the code I have used that should make at least one of the puzzle pieces moved. Unfortunately this code did not work as you can see on the image below; an error showed up which I was unable to find a solution to.

I've tried to follow the tutorial on the let step by step, especially since it seemed to be working but errors similar to this one would come up each time.

I think following this video's instructions didn't work because it uses an old version of Flash. Adobe Animate CC which I use as well as Flash are similar but Adobe has different codes.
Since the last YouTube tutorial wasn't able to help me, I have found a different one which also uses the technique I need to create a working puzzle. I followed the tutorial above and as seen on the left image, selected each piece by one and used code snippets to let Adobe insert the codes by itself into the script. Miraculously it worked and I was able to create a working puzzle, the main part of my unit.
Here I have taken a screen recording of me playing around with the puzzle pieces to show that they in fact work. I think the biggest struggle with this part of the unit was getting all the parts to work correctly, since Adobe Animate CC is a new program and has close to no tutorials. I had to go and find a Flash tutorial that would be as new as possible, so the versions wouldn't be too different as well as had to test out the coding multiple times before it finally worked.
I still have a lot of work to do with this unit, such as getting the ghost to animate and show the final screen when the puzzles are put into pieces. As well as make it's trail look like the google logo before slowly disappearing. I also might change it so that once the ghost is clicked the puzzle game begins, so everything is backwards as I planned instead.


After I got my puzzle to work in Animate CC I have realised I made a couple mistakes with my plans and that I had to adjust them. The flickering lights animation didn't suit the puzzle that happened beforehand at all colour wise, since I believe I used different colour adjustments when editing each frame. I also found it impossibly hard to find a code that would allow me to make an animation play after the puzzle and not beforehand. Because of this I have decided to instead make another animation which would play before you start the puzzle and be a nice starter.
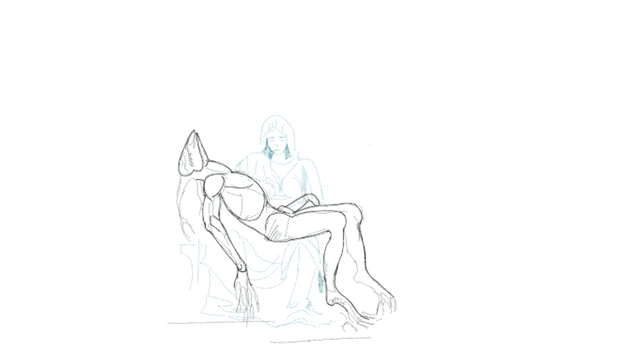
As you can see on the first image above this text, I made a careful outline of the movement the ghost will make across the room before setting that layer on invisible and putting green background instead so that it'd be easier to see on only one colour. As you can see on the middle screenshot I have worked using Krita, yet again, for this since it was more available to be and it was much easier to use. I worked from an already made ghost image I have made for the mouse trail animation, and made it's opacity lower so I could draw over it. I repeated this process 27 times to get a full animation. As seen on the gif on the right that I made on PhotoScape (Screenshot 2) the animation worked quite smoothly and nothing was out of the ordinary so I decided to put more effort into it.

I wanted to add more complexity to the animation without making it overbearing for the viewer, since the background is already quite clustered. I took the idea from when I made a simple ghost animation for the mouse cursor and have given the ghost eyes and small hands. It was quite exciting to work on this and making sure the eyes turned correctly at the angle I have imagined the ghost facing when I was doing the simple animation. On the top left image you can see the finished animation of the ghost on green background and then on the right you can see the animation working as a gif on the background I designed for the puzzle. I was easily then able to import the gif as a new scene on another layer on the Animate CC program.
The animation imported as 27 separate images, each which didn't fit into the canvas I made for the puzzle. Because of this I have re-scaled them to the proportions of 540 x 310 and had to spend some time carefully adjusting each one's position. After I have done that I was able to work on moving the puzzle frame to the very end of the animation so, like I've planned it'll start after.

What I immediately noticed after trying to test out my animation+puzzle was that the animation seemed to constantly loop over and not allow the player to get to the puzzle. I had to search up a YouTube video that taught me a very simple code that stopped the animation and allowed other events to happen. The video can be seen in top left corner.
Next to the video as well as on the right you can see the various codes I have used to make my final doodle work as well as which layer I used them on. The code that I have used on the right is a repeated code over and over, however each has a different symbol associated with it, this makes it possible for each individual puzzle piece to work and so I had to copy and paste it multiple times with those small changes to make the game playable. The simplest code I had to use was the last one (this.stop()) since it simply ended the animation and allowed the played to move onto the puzzle.

Final Result
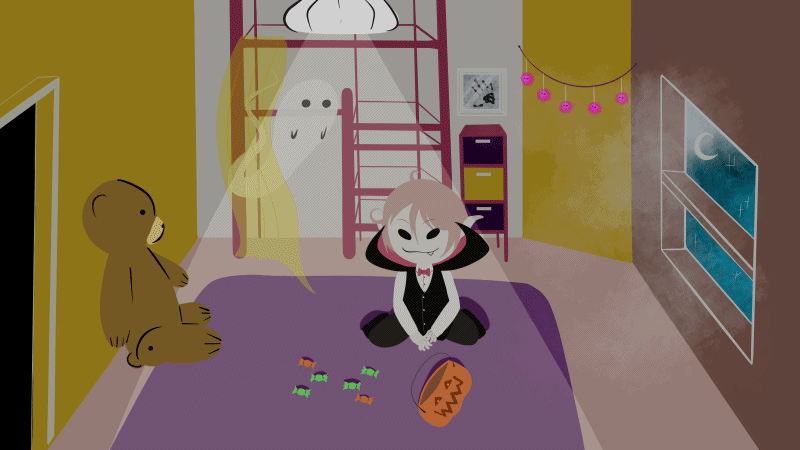
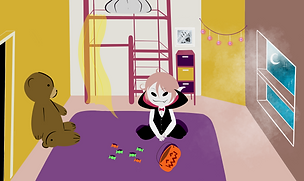
This is a screen recording I took of the final result of my doodle, which I then uploaded to Vimeo. As you can see I added a purple frame to make it easier to place everything on top of each other and not have the frames jump all over the place. I was not able to incorporate many things I wished to and many things changed as I worked due to time limitations. I was also unable to upload the game onto here since the new software we use (Animate CC) did not have such option unlike the software we used last year, Flash.
Evaluation
The theme of our project was to create an interactive animation or mini game in style of Google Doodle animatic, I found the concept of it very interesting at first however with time grew to understand just how hard it will be since I had no knowledge of action scripts and coding. I've mostly enjoyed the drawing and coding aspect of the project. Drawing was entertaining because it was something I could do at home as well as something I do everyday and is a hobby of mine. Coding on the other hand was thrilling because it was something completely new that I was able to learn by myself and something that beforehand I never showed much interest in however found out was more fun than I hoped.
I have learned a couple new things throughout this project. The most challenging ones were having to learn a complete new program after having learned Flash last year (This year we used the updated version; Animate CC) as well as learning basic coding. If asked which technique I'd like to develop further; I'd definitely state that I'd like to develop my understanding of coding, no matter on what program. This is because it is a helpful skill to have when going into any business that includes games or digital art.
Throughout this unit I was able to research many different things such as non linear animation and many different coding styles. I also was able to research the history behind the Google Doodles which was interesting. Google Doodles were a massive inspiration for my work since my project revolved around them, they helped me estimate how complex the animation should be and what art style would be most appropriate to catch attention of all age groups that could potentially be my audience.There wasn't a specific technique that I found more enjoyable than others unfortunately, all seemed exciting yet standard.
I think that the most successful part of my entire project was coding as well as standard art work that I created. I am very proud of being able to create a mini game along side an animation using codes, despite only learning them this unit. During my work I have encountered many problems which I had to work through. The first problem was not being able to find a video or a tutorial that helped me create a puzzle using the new version of the program I was using, this was easily solved by looking at tutorials from the older version and making alterations if necessary to the coding. I then had slight time management and idea management problems, both forced me to change the project drastically from my original idea, and I wasn't able to incorporate many ideas which I hoped to include. If given the chance to restart this project from scratch I would definitely lay out my ideas better and time manage the whole unit better, with a detailed time table of things I had to do by a certain time.